3.6 KiB
+++ title = "Panning" description = "How to pan signal in Ardour" chapter = false weight = 3 +++
Once you have established a good balance of levels on all the tracks, you can begin to think about panning.
Panning helps to establish a stereo field, a relative space between the speakers in which to place your sounds and instruments.
The Panning Interface
The panning control in Ardour is located in the middle of the mixer strip.
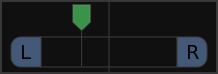
A mono track will have a mono panner. It looks like this:
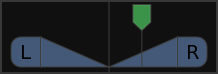
A stereo track will have a stereo panner, like this:
Mono Panner
The default mono panner distributes 1 input to 2 outputs. Its behavior is controlled by a single parameter, the position. By default, the panner is centered. You can change the position by clicking and dragging directly on the mono panner. Right-click on the panner to access other options.
Stereo Panner
The default stereo panner distributes 2 inputs to 2 outputs. By default, the panner is centered as well.
Panning Tricks
A more extensive discussion of panning philosophy and techniques is beyond the scope of this tutorial, but here are some general rules of thumb:
- Guitars tend to be panned to the left and right.
- Vocals and bass tend to placed in the center. You want to create a balance so that one side is not louder then the other.
- Headphones may be helpful in determining how instruments should be panned, and whether the mix feels lopsided because one side is too loud.
Two other tools that are useful in creating a "spatial" or stereo field are Reverb and Delay. These effects can be used together with sends to create a drum send which would be further back in the mix with more Reverb, and a vocal send which might have a little more Delay but sound closer than the drums. Please see the sections on using plugins and sends later in this part of the tutorial for more information.
{{% notice tip %}} Always keep an eye on your levels while panning tracks! Panning a track to one channel increases the level of that channel. This may change the balance of levels you set up in the previous chapter, and in extreme cases can result in clipping. When this happens, reduce the overall levels of that track and check again how it sits in the mix. {{% /notice %}}
Multichannel Panning
As Ardour supports multichannel tracks, it will also provide a multichannel-specific panning user interface for those tracks as well. Here is an example of a 4-channel audio track. You can see that there is a small user interface right in the mixer and a larger editor window that you can access by clicking anywhere in the empty space inside the panning area:
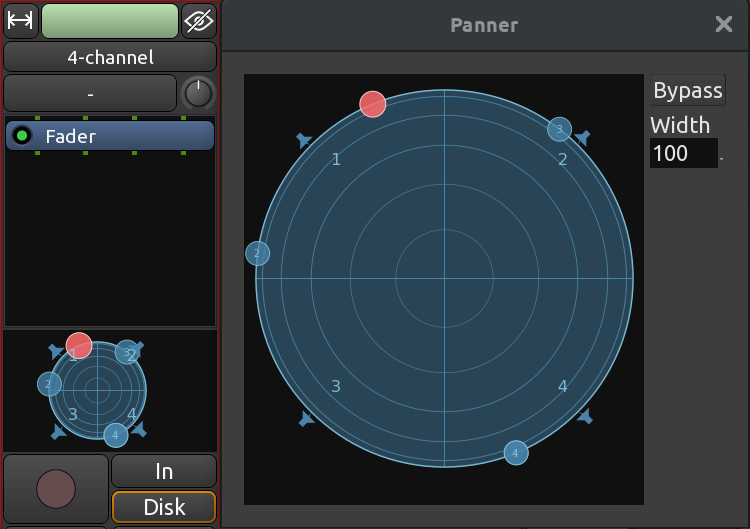
Unless you work on projects where e.g. Ambisonics is involved, you will probably mostly deal with multichannel tracks when you use samplers, especially drums/percussion samplers. As different instruments in a drum kit tend to get a different treatment in post-production (e.g. how they are processed with a compressor), samplers tend to create a channel per instrument: one per kick drum, one per each snare etc. The idea is that you would route a channel into a separate bus and process it differently. Using a panner control in that case is unlikely to happen.
Continuing
By now, you should have a collection of tracks which are both mixed well and have an exciting stereo image. In the following chapters, we will learn about using plugins to enhance the sound of your mix.
Next: USING PLUGINS