4.2 KiB
+++ title = "Setting up the timeline" chapter = false weight = 5 +++
Once you import some audio files to Ardour, play them back and start familiarizing yourself with the user interface, you might want finetuning various parts of the user interface for your needs. The timeline settings are one of the obvious options there, because what you want to see on the timeline largely depends on the kind of material you work on.
Users creating audio plays, documentaries, reportages or soundscapes may wish to use minutes and seconds for units, while those recording bands or producing electronic music will most likely use bars and beats. Video producers will find a frames-per-second timecode handy, while those wishing for extreme precision may even want to use samples. All of these can be viewed in Ardour and used as a means to organize your regions and edits.
Let's talk about setting up clocks, snapping, and timeline rulers.
Primary and Secondary Clocks
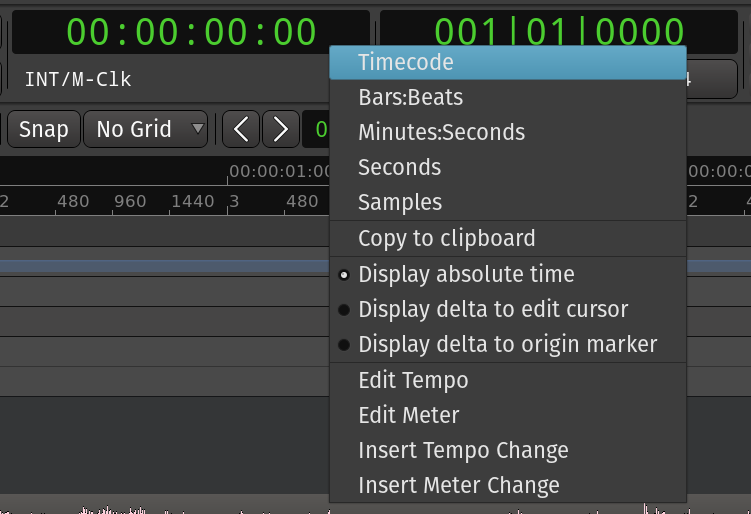
There are two clocks near the top of the Editor window which can display the time in a number of formats: Timecode, Bars:Beats, Minutes:Seconds, and Samples. Right-click to change the format of each of the two clocks.
These are called the transport clocks. The left one is the primary transport clock and the right one is the secondary transport clock. The advantage of having two transport clocks is that you see the playhead position in two different time units without having to change any settings.
If you never need the second clock, you can disable it entirely. Go to
Edit > Preferences > Appearance > Toolbar and disable the Display Secondary
Clock checkbox.
Please check the Ardour manual for more information on clocks.
Snap Modes
Snapping settings are located just below the clocks to the right. They control the quantization of the time grid, i.e., to which units the timeline grid is divided and to what extent audio regions and MIDI notes get snapped when snapping is enabled. E.g. you can snap to whole seconds when you drag an audio region around or you could snap to a 1/16 note when creating or editing MIDI notes.
There is one global switch, Snap, and then a drop-down list of grid quantization presets: Bar, 1/4 note, 1/8 note etc., Triplets, Timecode, Minutes and Seconds, CD frames, and more.
When No Grid quantization preset is selected, there is no grid displayed on the tracks/busses canvas. In that case, with snapping off, nothing will snap. And with snapping enabled, regions and notes will only snap to location markers.
Timeline
The timeline is located below the snapping settings, just above the main canvas. By right-clicking on the timeline labels (i.e., right-click on the left-side area where the words "Timecode, Bar:Beats, Meter" etc are displayed), you can set the check boxes to show or hide the different types of time information.
{{< figure alt="Timeline" src="en/ardour7-timeline-rulers.png" >}}
- Minutes/Seconds
- To view minutes and seconds on the timeline, right-click the timeline labels and select Mins:Secs.
- Bars/Beats
- To view bars and beats on the timeline, right-click the timeline and select Bars & Beats.
- It is possible to set a time signature and tempo for the entire Ardour session, as well as to change them at different points in the same session. For more information on this, please see the Setting Up The Time Signature chapter.
- Timecode
- To work with SMPTE video timecode, first you need to set the timecode
fps (frames per second). This can be found in the timecode tab of the
Session Properties window (
Session > Propertiesin menu or the Alt+O shortcut).
{{< figure alt="Timecode" src="en/Ardour6_Timecode.png" >}}
Once you have done that, make sure you make the Timecode ruler visible by right-clicking in the timeline and checking the Timecode box.
Continuing
Now that you've set up the timeline, continue on to the chapter on installing plugins. This is will come in handy in the next chapter when you learn how to record MIDI.
Next: INSTALLING PLUGINS

