6.6 KiB
+++ title = "Editor window" description = "Basics of Ardour's editor window" chapter = false weight = 1 +++
When you create a new session, Ardour opens an empty new window called the Editor window. The Editor window is the most important window in Ardour, as this is where you arrange track, import and edit media on the timeline, and control plugin automation for creative effects and mixing.
Let's take a look at main parts of the Editor window:
{{< figure src="en/ardour7-editor-window-sections.png" alt="Editor window sections" >}}
Here they are:
- Editor-specific toolbar
- Timeline
- Tracks and busses
- Project overview
- Editor mixer strip
- Regions, Tracks/Busses, Snapshots, Groups, Ranges, Marks
Let's overview them quickly.
Editor-specific toolbar
Edit Modes and Cursor Modes
The Edit Modes and Cursor Modes controls define the behavior of the main canvas and the different functions the cursor can have. There are three edit modes in the drop-down menu: Slide, Ripple, and Lock. We will discuss them in the Editing sessions chapter.
To the right of the Smart button are the Cursor Modes:
- Smart mode (Y shortcut)
- Grab mode (G shortcut)
- Range mode (R shortcut)
- Cut mode (C shortcut)
- Stretch mode (T shortcut)
- Audition mode
- Draw mode (D shortcut)
- Internal Edit mode (E shortcut)
Most of them are discussed in the Working With Regions section. The last two are discussed in the Using Automation chapter.
The Smart mode is actually a combination of Grab mode and Range mode. When enabled, the mouse behaves as if it is in Range mode in the upper half of a region, and in Grab mode in the lower half.
Snap Options
The Snap Options toolbar allows selecting visible grid units that affect snapping when editing regions and, in case of MIDI regions, their contents.
Here is a comparison between 1 bar grid, 1/8 note grid and 1/32 note grid:
{{< figure alt="1-bar grid, 1/8 note and 1/32 note grid" src="en/ardour7-snapping-1-bar-to-1-32-note.png" >}}
Please see the sections on Setting Up Time Signature, Using Ranges and Working With Regions for more details.
Track View and Zoom Options
The far right part of the toolbar has track view and zoom options.
Track view options allow selecting how many tracks to display at the same time, and you can also shrink or expand the vertical zoom of selected tracks and busses.
Zoom options allow incrementally zooming in and out, as well as zooming out to show the entire project horizontally.
{{% notice tip %}} Use the shortcuts = (the equal sign on your main keyboard) for zooming, and - (the dash key on your main keyboard) for zooming out. {{% /notice %}}
The drop-down menu controls the zoom focus. It defines the focus point of zooming operations. Try zooming in and out with a different zoom focus each time. For example, choosing Playhead will cause zoom to behave in relation to the position of the Playhead. Mouse will take your current mouse position as the reference, and so on.
Timeline
Right-click on the names of rulers and you will see a menu with all the possible rulers at your disposition. You may uncheck rulers that you don't need in order to save screen space. More information on these operations can be found in the Setting up the Timeline and Setting Up Time Signature chapters.
Tracks and Busses
Just below the rulers is where tracks and busses are displayed. In the example below, you can see one bus called Master and one track called MyTrack. MyTrack also contains one region which represents an audio file with a drawing of its waveform. More information on tracks and busses can be found in the Creating a Track or Bus chapter.
Project Overview
This is a bird's-eye view of the entire session.
{{< figure src="en/ardour7-overview-panel.png" alt="Project overview" >}}
There are two major use cases here:
-
Navigating around the project. Just grab the rectangle and drag it around to pan over the entire project.
-
Tweaking zoom and position of the visible part of the project. Grab the left or the right side of the visible rectangle's border and drag it inwards or outwards to zoom in or out respectively.
Editor Mixer
The Editor Mixer is located at the left of the Editor window. It displays the mixer strip of the currently selected track or bus. It's mainly used to control the volume, plugins, and routing for the track or the bus to which it corresponds.
You can toggle to view or hide the Editor Mixer by clicking on the menu
View > Show Editor Mixer (Shift + E shortcut). This Mixer is covered in
the Using the Mixer Strip chapter.
Editor List
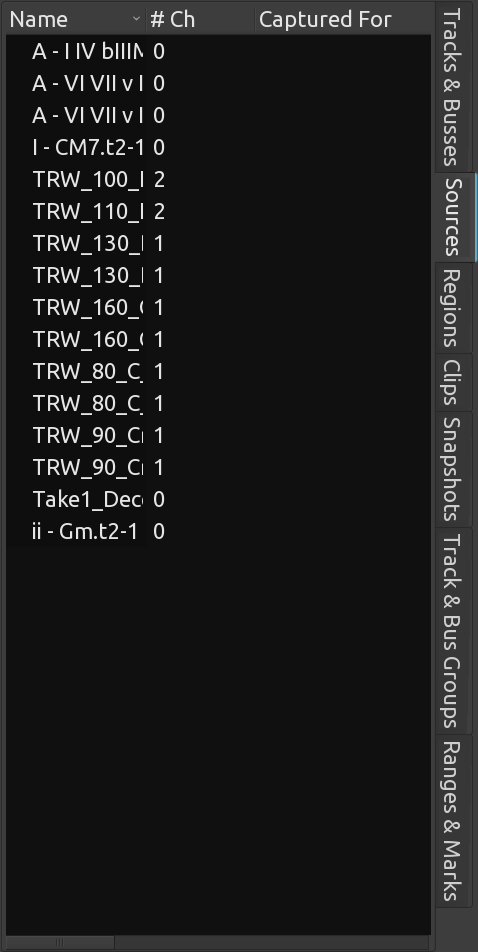
The space on the right of Ardour's Editor window can have 7 different functions, depending on which tab is currently selected: Tracks & Busses, Sources, Regions, Clips, Snapshots, Track & Bus Groups, and Ranges & Marks.
- Tracks & Busses provides an overview of all tracks and busses in the project, including the invisible ones. This tab is covered in the Arranging Tracks chapter
- Sources lists all files on the disk imported to the session.
- Regions is a list of all takes in the session. You can reuse both sources and regions by dragging them onto the canvas. You'll find more information on regions in the Working With Regions chapter.
- Snapshots are versions of the same session saved at particular moments in time, they are discussed in the Saving a Snapshot chapter.
- Ranges and Marks is an overview of all markers in the project, with an easy user interface to edit them.
Continuing
Next up is the Mixer window where you focus on making instruments stand out in a song.
Next: MIXER WINDOW


