3.5 KiB
+++ title = "Exporting a region" description = "How to export regions in Ardour" chapter = false weight = 2 +++
You may wish to export only a region of your session, perhaps to use as a sample in another application, or to edit it in a different program. This chapter shows you how to do that.
Exporting a Region
To export a region, select it in Grab mode and then right-click into the
sub-menu Export, or use the top menu: Region > Export.
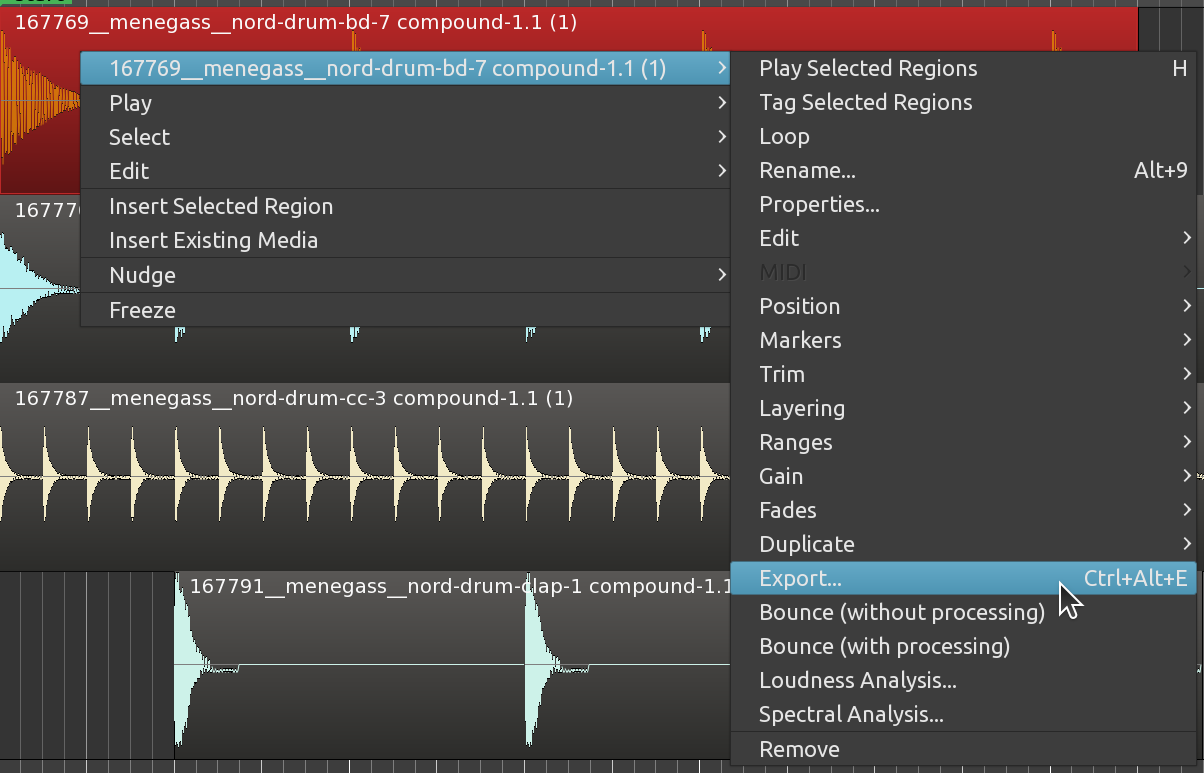
This will open up the same export dialog box explained in the Exporting Sessions chapter. Choose your options and click Export. Only the selected region will be exported.
{{% notice tip %}} Not all parameters and edits are taken into consideraton when exporting a region. Trimmed, split, stretched and reversed regions can be exported, but edits such as panning and automation are not exported. {{% /notice %}}
Also, the volume of the audio track itself or the Master bus will not affect the exported file. To export these edits, please see the chapters on exporting a range and exporting a session.
Exporting Several Regions At Once
If you are building a collection of samples to use later in another software, and your samples are basically trimmed and edited regions, at the end of the process you will need to export all of them. If the number is large, exporting them manually can be tedious. Here's one way of exporting several regions at once.
- In Grab mode (G shortcut), select all the regions you want to export. They do not need to be on the same track.
{{< figure alt="export region" src="en/ardour7-export-multiple-regions-1.png" >}}
- Go to the
Region > Rangesmenu and choose Add Range Marker Per Region.
{{< figure alt="export region" src="en/ardour7-export-multiple-regions-2.png" >}}
- Ardour has now just created range markers that fit exactly the beginning and ending of your selected regions (see the green rectangles in the range markers ruler):
{{< figure alt="export region" src="en/ardour7-export-multiple-regions-3.png" >}}
-
Go to the
Session > Exportmenu and choose Export to Audio File(s) (Alt+E). -
In the export dialog box, click on the Time span tab. You will see all the newly created ranges listed there. There is also a default range that stands for the entire session.
-
Under Time Span, click Select All and de-select the very first range (the "session" range). The reason is because we want to export the shorter ranges, not the whole session.
{{< figure alt="export region" src="en/ardour7-export-multiple-regions-4.png" >}}
- Go back to the main tab (File format) and click Export.
Your regions have now been exported to single audio files.
{{% notice tip %}} This method exports everything that falls under each defined time range. In other words, if you have other regions in other tracks sounding simultaneously with the region(s) you want to export, they will be mixed together. Another way of looking at it is this: the export operation will export everything that plays under the defined time ranges. If that is not what you want, you can use solo or mute buttons on select tracks to ensure you export only what you want. {{% /notice %}}
Continuing
Finally, the next chapter will discuss Exporting Ranges rather than just an individual region. The last trick (exporting multiple regions at once) in fact already involved using ranges, as you may have guessed.
Next: EXPORTING A RANGE